Not too long ago Ammoland Editor Duncan Johnson and I went to visit Palmetto State Armory’s numerous facilities. If you haven’t read the two posts about our visit, make sure to read both Part 1 as well as Part 2. As a part of our tour, we were allowed to build our very own Palmetto State Armory AR-15 in their assembly facility under the watchful eye of PSA’s top engineer.
What made me use some of the parts that I did? I had to use what was available, what was going to work with the 16″ Stainless Freedom barrel, and what I liked on a rifle. I also went with a slightly unconventional optic setup because, frankly, I wanted to try it out.
Optics
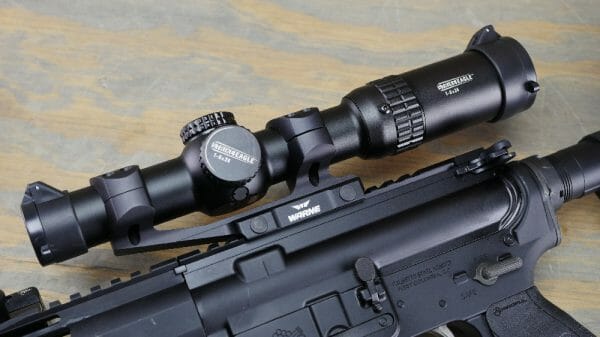
Let’s get the optics out of the way first, shall we? I selected a Vortex Strike Eagle 1-6 scope since I am rather familiar with the optic. I have one in a Warne mount just like this one on a beater rifle that I often reconfigure for reviews and another on the Ruger Gunsite Scout that I wrote about in my quest for the perfect truck gun as well as the review of the Gunsite Scout.
While it isn’t the optimal scope, it is cheap and effective. Zeroing the rifle is easy. It has an illuminated reticle, and magnification adjustments are easy. The easy-to-use BDC made shots out to 400 yards easy but spotting impacts was hard at times. The glass isn’t as clear as I would prefer and the reticle, while easy to acquire, is rather large and can cover an impact at longer ranges.

Where things got a bit untraditional is the addition of a Trijicon RMR RM 06 on a Magpul 45-degree M-Lok mount. This isn’t the most ideal setup for a 45-degree red dot, but it was what the Palmetto State Armory store had in stock at the time. While I didn’t really have a need to transition from magnified optics to a red dot quickly, I really wanted to see if those weird 3 gun guys are onto something.
While it was much faster to transition from near targets to further ones, I will say that I found the additional sight overkill for recreational shooting. I kind of expected that outcome and have since relocated the Trijicon RMR to a pistol, but I am really glad that I tried it out. Should I start shooting two or three gun, the dual optics setup would absolutely be worth revisiting.

Live Inventory Price Checker
Upper Receiver
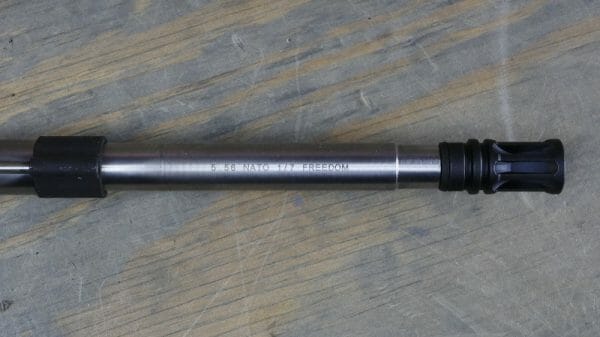
As I said earlier, the 16″ stainless steel Freedom barrel was the one factor that I didn’t choose myself. While we were at DC Machine, those were the barrels that were just coming off the line, and Josiah wanted us to see how our barrels were made. I am entirely happy with the 16″ stainless option since it checks all the boxes, a midlength gas system, a 1:7 twist rate, and is chambered in 5.56 NATO.

The flash hider is an A2 like PSA uses on just about all of their uppers and rifles. While I might have gone with a brake, the A2 is functional, and few other muzzle devices do as good of a job suppressing flash for as cheap as the A2 is.

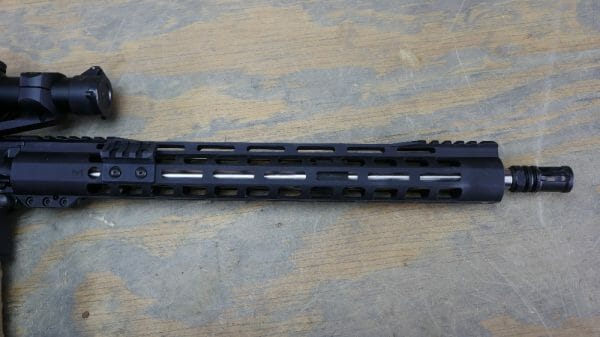
The handguard choice was easy. Both Duncan and I chose the 15″ lightweight M-LOK rail. The rail has a Picatinny rail to accommodate BUIS as well as a small section just forward of the upper receiver.

I found the barrel nut design rather interesting. My go-to rail is normally a Geissele MK8 13″ or 15″, depending on barrel length. One of the things I really love about the Geissele rail is the barrel nut, which is very similar to the PSA barrel nut.
Not only do I really like rails that secure with a pinch method, but installing the barrel nut is super easy since you don’t need to time it to the gas tube. Sure, there are other benefits, but there is still a ton to cover.

We used a forged upper receiver that was milled in the DC Machine shop, just like the barrel. As a part of their assembly process, PSA fits the forward assist and dust cover before it makes it to the assembly tables.
The charging handle is a standard mil-spec unit. While functional, it isn’t my first choice and will likely be replaced at some point with a BCM Gunfighter handle or a Radian Weapon Systems Raptor.
I am rather impressed by Palmetto’s Premium full-auto bolt carrier group. The staking on the gas key was done well. The machine work is on par with more expensive BCGs that are twice what you can get one for normally, and it has a Carpenter 158 bolt that has been HPT/MPI tested, chrome-lined carrier, and gas key, and even uses the correct grade 8 bolts.

As I just mentioned, the bolt is made from the correct steel for a mil-spec bolt, Carpenter 158. PSA also shot peens the bolt, has it mag particle inspected, and high pressure tested.

Digging into the bolt a bit further, we find a black insert extractor spring and a black o-ring to help with extraction.

Lower Receiver
We started with a standard stripped Palmetto State Armory lower and lower parts kits minus the trigger. I chose to go with a MIAD 1.1 grip since that is what is on most of my rifles and I really like the ability to use the slim panels without the A2 finger groove. The oil bottle in the grip is also nice to have at the range since I almost always forget to replace the oil in my range bag.

The reason I went with the lower parts kit without the trigger group is so that I could use the excellent nickel boron two-stage trigger Palmetto State Armory. With the first stage weight being 1 3/4 pounds and the second stage being the same, total trigger pull weight is 3.5 pounds.
The reset is nice and positive, and while there is a touch of creep as the trigger breaks, it is well beyond my expectations for a trigger that routinely sells for right at $100.

Since commercial receiver extensions are the work of the devil, we fitted a mil-spec tube made by PSA. I used a standard end plate and castle nut since those are perfectly adequate for my needs, I never use any of the endplate QD sockets on any of my other rifles.
The stock is an old favorite of mine, the Magpul CTR. I really like the simple, no-nonsense design, and the lock makes it feel a lot more substantial than many other stocks on the market. The CTR has been one of my go-to stocks since its introduction and will likely continue to be a favorite of mine.

Another thing that I do to all of my rifles is a Magpul MOE trigger guard or something similar. Since PSA has MOE trigger guards by the box full, there was no reason to not install one on the rifle.

How did it shoot?
While I don’t have thousands of rounds through the rifle, I have had a chance to put several brands of ammo through the rifle, putting the round count in the 450 to 500 round range. The reality is I just don’t go to a rifle range enough to get the round count up higher to see how my build will hold up in the long run.
The rifle has digested 55-grain, 62-grain, 75-grain, and 77-grain brass case ammo and even a bunch of steel case garbage ammo without a problem. The recoil impulse feels like an AR but a touch softer than a standard carbine gas system rifle, thanks to the mid-length gas tube.
When shooting the rifle for groups with a few types of ammo, I found the IMI Razor Core 77-grain load to shoot the tightest groups at 100 yards. The best I was able to eke out of the rifle using one of the new Magpul bipods and a rear bag was 1.614″. The worst performer was predictably the 62-grain xm855 with a 3.241″ group. If you aren’t impressed with 1.53 MOA out of an upper that can be had for under $300, I don’t know what to tell you.

Conclusion
I am super happy with how the build turned out, the only thing I have changed about the rifle is I removed the RMR. There just wasn’t a need for the second optic on a rifle that is going to almost exclusively be shot from a bench at 100 to 200 yards.
If I end up changing anything else on the rifle, it is going to be the standard mil-spec charging handle and the mil-spec selector. I would probably go with the Radian Raptor and the Talon selector, both are go-to parts and are installed on just about all of my non-clone builds.
Learn more about Palmetto State Armory’s product lineup on the PSA website, and don’t forget to check out their Daily Deals section. Sometimes it can be hard not to buy one of their deals.
About Patrick R.
Patrick is a firearms enthusiast that values the quest for not only the best possible gear setup but also pragmatic ways to improve his shooting skills across a wide range of disciplines. He values truthful, honest information above all else and had committed to cutting through marketing fluff to deliver the truth. You can find the rest of his work on FirearmRack.com as well as on the YouTube channel Firearm Rack or Instagram.

Some of the links on this page are affiliate links, meaning at no additional cost to you, Ammoland will earn a commission if you click through and make a purchase.


