When people come to my shop, they always get a tour of the solar kiln. I tell them it took a couple of weeks part-time to build, and the total materials cost was about $2,500. Inevitably, I’m asked, “Was it worth it to build?” And my answer is always, “Yes—I only wish I had built it sooner.”
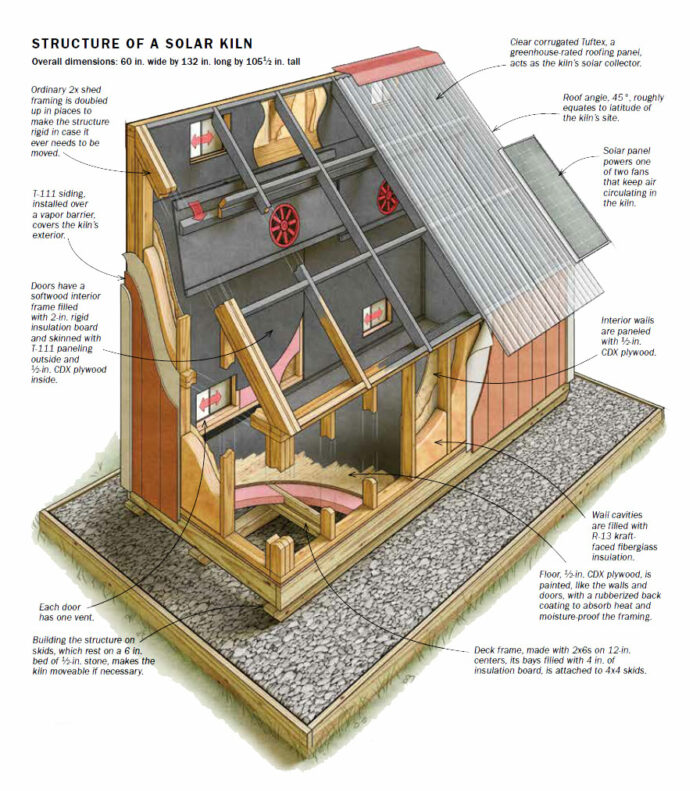
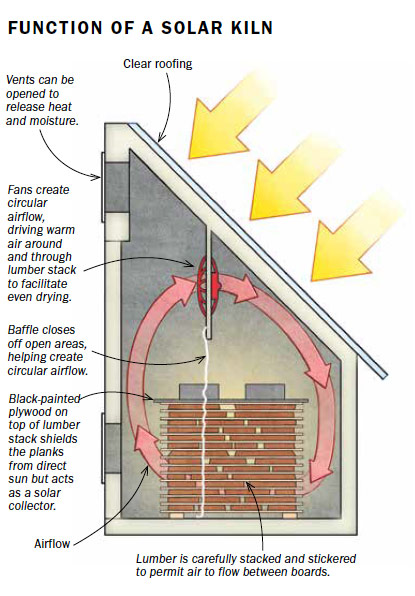
I had spent a couple of years toying with the idea, doing research that could be confusing and too scientific. It all felt too complicated to get started. But after finally taking the leap, I found that building and using a solar kiln isn’t complicated at all. The kiln is simply a well-insulated shed facing south with a passive solar-collecting roof, a black interior to absorb solar energy and heat the air, and fans to circulate it. It operates like a big, off-the-grid convection oven sending heated air through your lumber stack, with vents to let evaporated moisture out. That’s it.
A solar kiln dries lumber in much gentler cycles than a commercial kiln. When the sun is out, the heated air circulates, absorbing moisture from the wood. At night the lumber cools way down, the fans are off, and some of that expelled moisture in the air reabsorbs into the wood. This pattern makes for more relaxed (and somewhat slower) drying compared with the constant stress in a commercial kiln continually pulling out moisture.
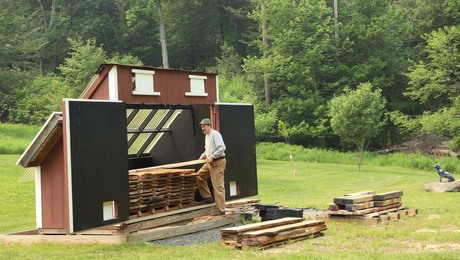
The solar kiln dries wood far faster than air drying alone, and it gets the lumber to a much lower moisture content. My solar kiln takes four to five warm, sunny summer weeks to dry a load of 5/4 green wood to 8% MC. I have dried cherry, walnut, ash, red maple, birch, and oak. It always amazes me the quality of lumber that comes out. The wood has good color, machines well, and works beautifully with hand tools. In my experience, it behaves much better than commercially dried material; when ripped, it moves very little if at all.
With a solar kiln, whether you buy green planks from a sawmill or have trees sawn on a portable mill, as I do, your cost per board foot will be far lower than buying kiln-dried lumber. In addition, some beautiful species of trees just aren’t commercially available kiln-dried. And, perhaps best of all, having your own solar kiln allows you to turn a fallen family tree into furniture. Every project I build now comes with a story.

Site and size
Locating your solar kiln is the first important step. You need a spot that has maximal sun exposure, a flat area to build on, and easy access for loading and unloading. If you don’t have the ideal spot, the kiln will still work. Less sun slows down drying, uneven ground is harder to build on, and poor access makes loading and unloading more difficult. But none of those need be a deal-breaker.Figuring out the roof angle comes next. It is recommended the angle of the solar collector be the same as the latitude of the location of the kiln. I’m in West Granby, Conn., at latitude 41.9561°. I decided to pitch my kiln’s roof at 45° to make construction easier. Adding those few degrees also gives slightly better results in the winter.
To keep my kiln modest in size, I chose to make the high back wall 8 ft. tall. I planned the interior width at 10-1⁄2 ft., so it would fit the 8-ft.-plus planks I typically cut with room to spare. Figuring in a knee wall 3 ft. high, those dimensions allow me to dry a maximum load of roughly 450 bd. ft. That works for me. Size your kiln to suit the loads you want to dry, keeping in mind the ratio of solar collector (the clear, corrugated, greenhouse roofing material) to board footage to be dried. If the wood is dried too fast, there will be more defects. The Virginia Tech Cooperative Extension article “Design and Operation of a Solar-Heated Dry Kiln” is an excellent overall resource and particularly helpful here. According to the article, you want 1 sq. ft. of solar collector for every 10 bd. ft. of 4/4 red oak in the kiln. There are industry standards for safe drying rates for different species. Soft maple can be safely dried much faster than oak. The dimensions I settled on gave me 70 sq. ft. of solar collector. This was closer to 1-1⁄2 sq. ft. of collector per 10 bd. ft., and here in New England that ratio has worked fine. There are several ways you can adjust your kiln’s daily drying rate.
The build
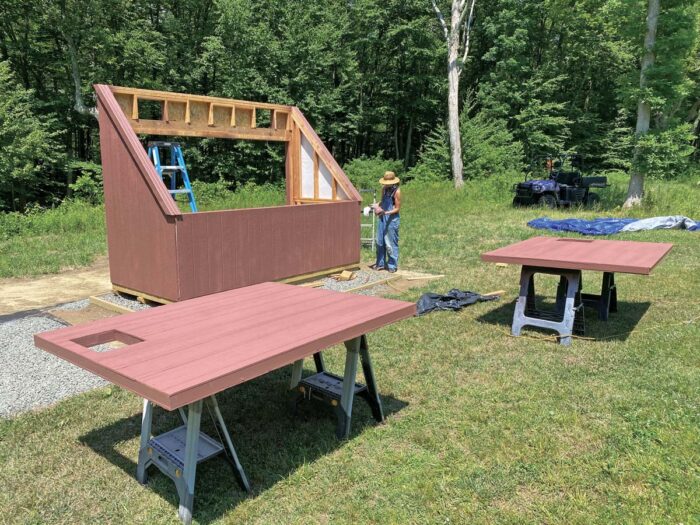
I built my kiln using standard 2x construction like you would see on a garden shed. I overbuilt the floor deck and the framing in anticipation of the heavy loads the floor would support and the possibility that I might want to move the kiln some day.
I began the build by flattening the ground. Then I built a rectangular frame of pressure-treated 2x6s on edge and filled it with 1⁄2-in. stone. Next, I placed three pressure-treated 4×4 beams lengthwise on the stone and leveled them. I thought having the kiln on skids would be best in case I ever do want to move it.
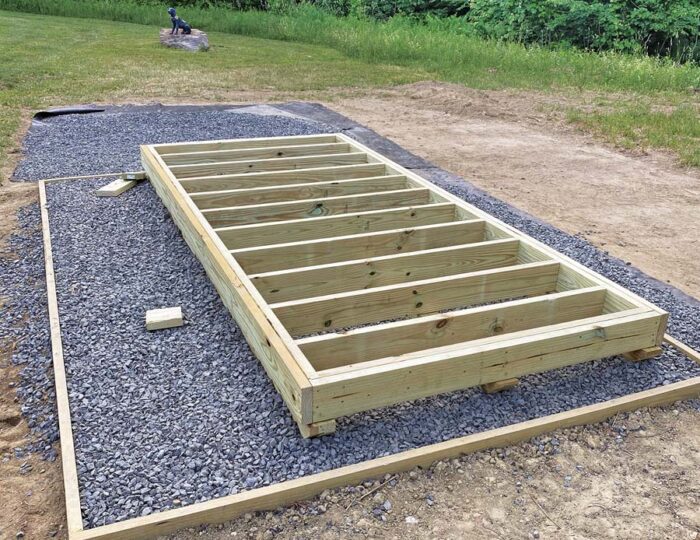
I built the deck frame on top of the skids, spacing the joists 12 in. on center and doubling up 2x6s around the perimeter. Once the deck frame was built, I fine-tuned its position so the solar collector would face precisely south. Then I attached the deck frame to the skids below. Between the joists I used doubled-up 2-in. rigid insulation board and expandable foam that had a total insulative value of R-20. For the floor, I used 1⁄2-in. CDX plywood.
members doubled up for rigidity.
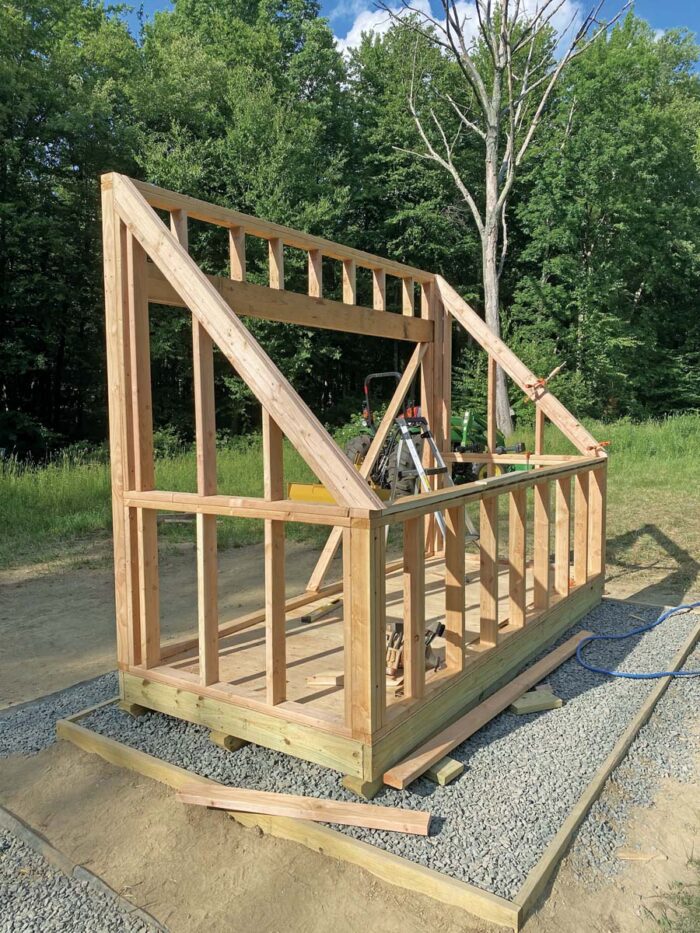
Next I framed the walls. I wrapped the structure with a vapor barrier and nailed pre-primed T-111 engineered siding to the exterior. Once the siding was up, I moved into my shop to make the doors. Concerned about the weight of such large doors, I milled down 2x4s to make stock 1-1⁄4 in. thick by 2 in. wide to frame the perimeter and the vent openings.
Rubber and roofing
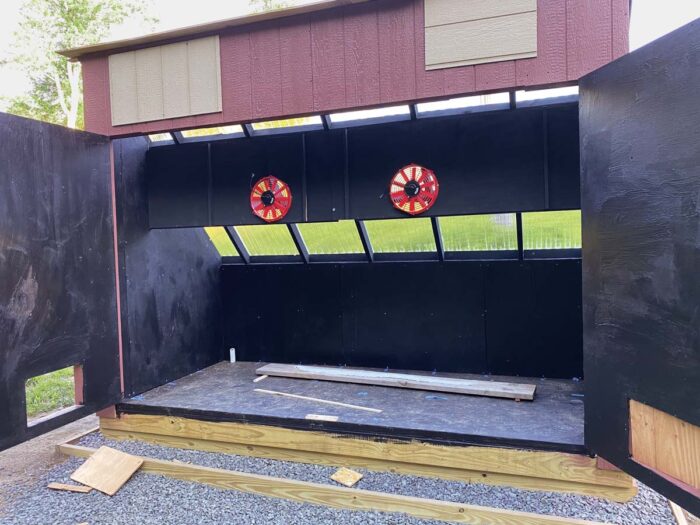
The kiln gets very humid inside during the first several days of drying green material: Water droplets form on the roof and walls and even puddle on the floor. To contend with this, the interior of the kiln gets a black rubberized coating that protects the wood and plywood from moisture. The coating also serves as a solar collector, absorbing heat from the sun. There are other options for a black vapor barrier, but I used Black Jack Rubr-Coat 57. It is very difficult to mix and also very thick and difficult to apply. I mixed it with a mixing attachment on a drill, and instead of painting the CDX plywood interior walls in place, I pre-cut them and applied the coating with the pieces on sawhorses, so I could pour out the coating; I spread it with disposable brushes. I coated the floor before installing the wall panels so I could paint right into the corners and up onto the bottom plate of the wall. A 5-gal. pail was just enough for me to do the walls and floor. For economy’s sake, I used exterior-grade flat black paint on the rafters.
After insulating the walls with R-13 kraft-faced fiberglass insulation, I attached the wall panels and sealed all the seams with black caulk rated for high temperatures.
Next I attached the pre-painted rafters. Because the plastic roofing material is much thinner than a standard roof, I added horizontal bracing between the rafters.
 For the solar collector I chose a clear Tuftex polycarbonate greenhouse-rated roof panel available at big-box stores. There are several options for greenhouse-rated panels that would work as a passive solar collector.
The two fans that circulate air through the lumber stack are critical to the kiln’s operation. Fans made to tolerate high temperatures can get pricey, but I opted for a cheap and simple pair of plastic automotive radiator fans. They are 12-volt fans rated at 875 cfm each. They provide plenty of airflow for my size kiln and have no trouble tolerating fluctuations in power. After four years they are running flawlessly.
I don’t have power available to the kiln, so I power my fans with two solar panels. When the sun is out, the fans spin. Simple as that. They even spin on cloudy days, just not as fast. The solar panels are each 100-watt monocrystalline panels that were easy to install and wire directly to the fans.
In many solar-kiln designs the fans are attached permanently. But that makes it awkward to load and unload the kiln. I hung the fans on 1⁄4-in. plywood supported by a French cleat. When it’s time to load or unload, I simply unplug and remove the fans (tool free) and set them aside.
If you build a solar kiln, I hope you enjoy the process of building—and of drying your own wood. Let the drying begin!
—Brenon Plourde dries and works wood in West Granby, Conn.
Drying wood in a solar kiln

Stop Guessing at Wood Movement
How To Dry Lumber
Sign up for eletters today and get the latest techniques and how-to from Fine Woodworking, plus special offers.
Download FREE PDF
when you enter your email address below.
View PDF