Introduction
Embarking on the journey of seed starting can be both exciting and daunting for any gardener. Whether you’re a seasoned pro or a novice enthusiast, understanding the fundamentals and mastering the techniques is key to nurturing healthy plants from the very beginning. In this comprehensive guide, we delve into five effe
ctive techniques for successful seed starting, covering everything from soil preparation to proper watering and beyond.
Getting Started with Seed Starting
Before diving into the specifics, it’s crucial to lay the groundwork for successful seed starting. This involves gathering the necessary supplies, including trays or containers, a quality seed starting mix, seeds of your choice, and labels for organization.
Preparing the Seed Starting Mix
The foundation of healthy seedlings lies in the quality of the seed starting mix. Create a well-draining yet moisture-retentive blend by combining ingredients such as peat moss, perlite, and vermiculite. Avoid using garden soil, which can compact and hinder seedling growth.
Selecting the Right Seeds
Choosing the right seeds sets the stage for successful seed starting. Opt for high-quality seeds from reputable suppliers, ensuring they are well-suited to your climate and growing conditions. Consider factors such as germination rates, disease resistance, and growth characteristics when making your selection.
Sowing Seeds
Proper sowing techniques play a crucial role in seed starting success. Follow recommended sowing depths and spacing guidelines for each type of seed. Gentle patting or lightly covering the seeds with a thin layer of soil promotes good seed-to-soil contact, aiding in germination.
Providing Optimal Growing Conditions
Consistent moisture and appropriate temperature are essential for germination and seedling growth. Keep the seed starting mix consistently moist but not waterlogged, utilizing bottom watering or a fine mist to prevent disturbance. Maintain a consistent temperature range, typically between 65°F and 75°F, to encourage robust growth.
Seed Starting Troubleshooting
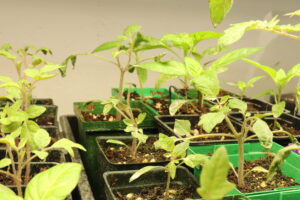
Even with careful attention and proper technique, challenges may arise during the seed starting process. Common issues include damping-off, fungal diseases, and leggy seedlings. Identify problems early and take corrective action, such as improving air circulation or adjusting watering practices, to salvage your seedlings.
Transplanting Seedlings into Coco Core: A Method for Healthy Growth
Introduction
Once your seeds have sprouted, the next critical step is transplanting them into a nutrient-rich medium conducive to vigorous growth. This method involves utilizing coco core, treated with biofungicides and supplemented with essential amendments to provide optimal conditions for seedling development.
Transplanting Process
After the seeds have sprouted, typically within three to four days, it’s time to carefully transplant them into coco core. Begin by expanding a compressed coco block and treating it with biofungicides to prevent damping-off, a common cause of seedling mortality.
Coco Core Preparation
To enhance the coco core’s properties, mix in several key amendments:
-
- Alfalfa Meal: Rich in tricantanol, a natural growth stimulant.
- https://northoftheriverstore.com/product/down-to-earth-alfalfa-meal-natural-fertilizer-2-5-05-2-5-omri/
-
- Kelp Meal: Provides cytokines and other natural growth regulators.
- https://amzn.to/3WKY3vy
-
- Insect Frass: Contains chitin, stimulating seedling immune responses for stronger growth.
- https://amzn.to/3WIa5Ws
-
- Worm Castings: Enriches the medium with beneficial microorganisms and nutrients.
-
- General Grow Fertilizer: Provides essential nutrients for early seedling growth.
- https://northoftheriverstore.com/product/roots-organics-uprising-grow-organic-fertilizer-with-beneficial-bacteria-and-mycorrhizae-6-1-2-npk-3-lb/
-
- Bone Meal: Supplies phosphorus for root development and overall plant health.
- https://northoftheriverstore.com/product/greenway-biotech-bone-meal-fertilizer-3-15-0-plus-24-calcium-for-plants-strong-root-development-plant-food-source-of-nitrogen-and-phosphorus-for-gardening-flowering-plants-2-pounds/
Unique Aeration Method
Instead of traditional perlite, this method utilizes ground oyster shells for aeration. Oyster shells are rich in calcium, which not only aerates the medium but also buffers the coco core’s negatively charged nature. This ensures the availability of calcium ions for seedling roots, crucial for cell division and overall growth.
Benefits of the Method
-
- Prevents Damping-Off: Biofungicides prevent fungal and larval infestations, ensuring seedling health.
- https://northoftheriverstore.com/product/botanicare-hydroguard-bacillus-root-inoculant-quart/
-
- Promotes Strong Growth: The combination of amendments provides a balanced nutrient profile and stimulates robust growth.
-
- Enhances Nutrient Availability: Ground oyster shells supply calcium and aid in buffering the coco core, ensuring optimal nutrient uptake by seedlings.
FAQs about Seed Starting
-
- How deep should I plant my seeds? Planting depth varies depending on the type of seed. As a general rule, seeds should be planted at a depth approximately two to three times their diameter.
-
- When is the best time to start seeds indoors? The timing for starting seeds indoors varies based on your location and the specific plants you’re growing. Refer to seed packets or local gardening resources for recommended sowing dates.
-
- Can I reuse seed starting mix? While it’s possible to reuse seed starting mix, it’s important to sterilize it first to prevent the spread of disease. Alternatively, consider composting used mix and starting fresh each season.
-
- How often should I water my seedlings? Seedlings require consistent moisture to thrive. Water when the top layer of soil begins to feel dry, aiming to keep the mix evenly moist but not waterlogged.
-
- Why are my seedlings leggy? Leggy seedlings often result from inadequate light or excessive nitrogen fertilization. Provide ample light sources and avoid over-fertilizing to encourage sturdy, compact growth.
-
- What should I do if my seedlings are overcrowded? If seedlings become overcrowded as they grow, carefully transplant them into individual containers or thin them out to provide adequate space for healthy development.
Conclusion
Successful seed starting is both an art and a science, requiring attention to detail, patience, and a bit of experimentation. By mastering the techniques outlined in this guide and staying vigilant for potential challenges, you’ll set yourself up for a bountiful harvest and a rewarding gardening experience.


